How to Configure Your New Unifi Whole Home WiFi System
General Instructions:
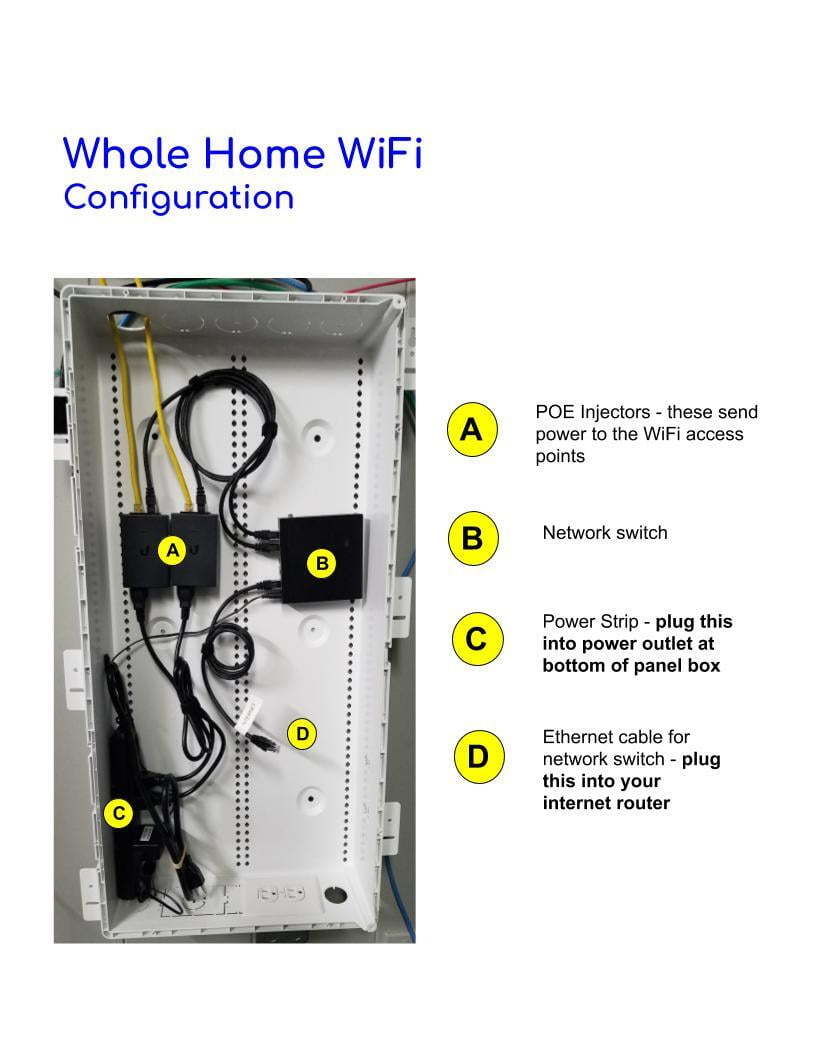
- Plug the power strip into the power outlet, then make sure the ethernet cable (labelled "D" in the image to the right) is plugged into your internet router. It has a label on it that says "INTERNET"
- Make sure you have your WiFi SSID (network name) and password. These are on the router provided by your internet service provider, or may have been changed by you or your service provider technician
- Refer to the video below to configure the access points and activate your Whole Home WiFi
Contact us if you need help or have questions!
Configuration Notes:
Your WiFi Access Points are already installed and the wires are connected to the Power Injectors in your low voltage panel.
You do not need to remove the WiFi Access Points to scan the QR code (as shown in the video below), you can simply run the app and it will scan for them. Then you can configure them per the video instructions.
For best results, use the same SSID and password that your router's WiFi is set to for both WiFi Access Points (configuration settings shown in video below).
Once configured, the WiFi Access Points may take several minutes to complete the installation. During this time, the LED indicator will flash. Once complete, the LED indicator should glow a steady blue.